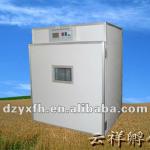
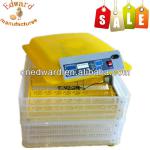
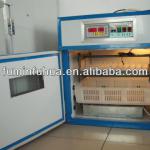
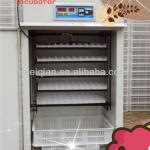
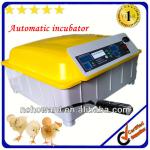
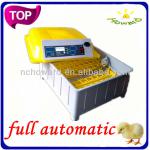
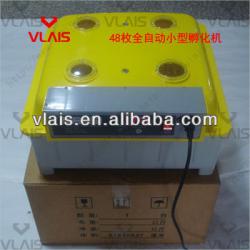
Large Supply 48 eggs automatic hatching machine Family Fully automatic poultry egg incubators prices
| Usage:Chicken,Reptile,Bird,Emu,Ostrich,turkey goose duck and so on | Egg Capacity(pcs):48 | Condition:New | Place of Origin:Guangdong China (Mainland) |
| Brand Name:VLAIS | Model Number:V-48 | Voltage:220V,110V/220V | Power(W):160W |
| Dimension(L*W*H):0.51x0.29x0.52M | Weight:4KG | Warranty:2 | After-sales Service Provided:No overseas service provided |
| Electric power:160W | Machine size:510*290*520mm | chick egg:48 |
1. Testing you unit for the first time:
1.1 Connect the egg turner plug to the control plug inside the egg compartment.
1.2 Connect the provided power supply to the back of the unit and your power source.
1.3 Switch on your power source.
1.4 Switch your unit on.
1.5 You will hear an alarm sounding due to low temperature/humidity.
1.6 Press any of the green buttons to cancel the alarm.
1.7 By opening the incubator and filling the water channels you will notice the humidityreading increase.
1.8 Let the unit run for 2 hours to note the egg turner turning.
2. Setting the temperature
2.1 Push “SET” once.
2.2 Push “+” or “-“ to select the desired temperature.
2.3 Push “SET” once more to exit.
- These incubators are factory set at 38oC, I found the chicks hatch at day 19 to
20 meaning the temperature being to high. Using the method as described
above. I recommend you set the temperature at 37.6oC.
3. Temperature alarm parameter settings(AL and AH)
The temperature alarm is factory set to sound at 1oC over or below the set temperature. This is sufficient and you do not need to make any changes to these settings.
3.1Low temperature alarmparameter setting. (AL)
3.1.1 Press and hold “SETT” for 3 sec.
3.1.2 Push “+” or “-“ until code “AL” appears in the temperature screen.
3.1.3 Push “SET”
3.1.4 Push “+” or “-“ to adjust to your desired lower alarm setting.
3.2Higher temperature alarmparameter setting (AH)
3.2.1 Press and hold “SETT” for 3 sec.
3.2.2 Push “+” or “-“ until code “AH” appears in the temperature screen.
3.2.3 Push “SET”
3.2.4 Push “+” or “-“ to adjust to your desired higher alarm setting.
4. Humidity alarm parameter settings(AS)
The humidity alarm is factory set to sound at 45% humidity. This is sufficient and you should not deed to make any changes to these settings.
4.1 Low humidity alarm parameter setting. (AS)
4.2 Press and hold “SETT” for 3 sec.
4.3 Push “+” or “-“ until code “AS” appears in the temperature screen.
4.4 Push “SET”
4.5 Push “+” or “-“ to adjust to your desired lower alarm setting.- By filling both water channels the humidity should rise to 60% dependant on thelocal humidity levels and the time of year. I tend to fill both my water channelsevery 4 to 5 days and at day 18 when I remove the egg trays I over fill them toincrease the humidity to about 65%.
5. Calibrating temperature sensor reading(CA)
The thermometer correct reading is set at 0oC. The reading given by the thermometer can be adjusted if you find that the temperature reading is incorrect using a calibrated thermometer.
5.1 Calibrating the temperature sensor measurement. (CA)
5.2 Press and hold “SETT” for 3 sec.
5.3 Push “+” or “-“ until code “CA” appears in the temperature screen.
5.4 Push “SET”
5.5 Push “+” or “-“ to adjust to the correct measurement.
- Note that the adjustment is the difference between the thermometer readings
and should be adjusted with “- “ if the temperature reading of the incubator is to
high and normal value (indicating + value) if the incubator reading is too low.
6. Temperature Upper and lower limit set(HS and LS)
HS- (High Set) andLS- (Low Set) set the limit of the setting range of the desired temperature setting (incubating temperature adjustment)
If HS is set as 38.2 and LS is set as 37.4, then the desire temperature (incubating temperature adjustment) can only be changed from 38.2 to 37.4, so the minimum temperature shall be limited to 37.2 even if the “-“ is kept on pressing. The same goes for the High Set Limit.
- This is to prevent accidental out of range temperature setting.
7. Heating Element(HU and HD)
Parameter HU and HD, set by factory and is not supposed to be modified by user.
HU -Default setting is 18 ( I believe it’s Heat Up power setting, controlling the start up power to the heater to bring it up to the desired temperature setting (incubating temperature adjustment). Setting Range 1~90.
HD -Default setting is 11 ( I believe it’s Heat Down power setting, controlling the power to maintain the heater at the desired temperature setting (incubating temperature adjustment).
Setting Range 1~80.
- These are settings I have never adjusted or attempted to adjust as the heating
unit starts and stops within 1oC of my set temperature of 37.6oC.
8. Display Symbols
| Number | Symbol | Meaning | Factory Setting |
| 3.1(above) | AL | Low temperature alarm parameter setting | 1oC |
| 3.2(above) | AH | Higher temperature alarm parameter setting | 1oC |
| 4.1(above) | AS | Low humidity alarm parameter setting | 45% |
| 5.1(above) | CA | Calibrating the temperature sensor reading | 0oC |
| 6(above) | HS | Temperature higher limit set | 39.5oC |
| 6(above) | LS | Temperature lower limit set | 30oC |
| 7(above) | HU | Heating starts | 18 |
| 7(above) | HD | Heating stops | 11 |
9. Using your Incubator
1. Test your incubator to see if it functions properly.
2.Connect the egg turner plug to the control plug inside the egg compartment.
3. Fill one or both water channels depending on local humidity levels.
4. Set the eggs with the pointy side down.
5. Close the lid and switch on the incubator.
6. Press the reset button (left green button) to reset and start the day counter from “0”.
(this will also rest the egg turning countdown back to 1:59)
7. Keep an eye on the humidity reading and fill the water channels when needed.
(normally every 4 days)
8. At day 18 you should remove the tray with the turning mechanism and place the
eggs on top of he bottom grid.
9. At the same time it is important to fill both water channels to increase thehumidity. (this is very important to ensure that the eggshells are soft enough for
the chicks to break through.)
10.You should never open the lid when the chicks start to hatch. If you do, the loss ofhumidity will cause the eggshells of the unhatched eggs to dry out and they won’table to break through the egg.

| Packaging Detail:Color box carton per set |
| Delivery Detail:within 3 days |


