CNC vertical turning and milling machine
| Place of Origin:Liaoning China (Mainland) | Brand Name:Wa | Model Number:CKX5240-2A | Condition:New |
| After-sales Service Provided:Engineers available to service machinery overseas |
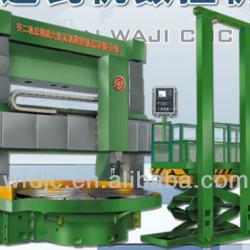
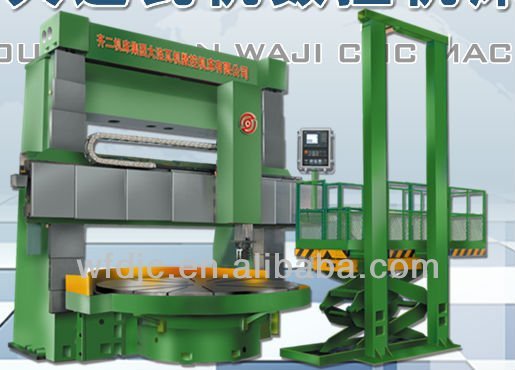
CKX5240/2A DOUBLE COLUMN VERTICAL MILLING AND TURNING MACHINING CENTER
(DOUBLE CNC TOOL HEAD)
This specification is specially used forΦ4000×2000 double column vertical milling and turning machine.
1. Specification
| No. | Item | Parameter |
| 1 | Max. turning diameter | 4000mm |
| 2 | Table diameter | 3600mm |
| 3 | Max.height of workpiece | 2000mm |
| 4 | Table load | 30t |
| 5 | Table torqure(KN-m) | 96 |
| 6 | table speed(r/min) (turning ) | Ⅰ0.63-4-16 Ⅱ2.5-16-63 |
| ( Milling and indexing ) | 0.001-2 | |
| 7 | The max. cutting force of tool head( Right turning tool head ) | 25 |
| ( Left milling tool head ) | 32 | |
| 8 | Section of left milling tool head ram | 250×250(mm) |
| 9 | Horizontal stroke of tool head(Right tool head) | 2220mm |
| (Left milling tool head) | 2250mm | |
| 10 | Vertical stroke of tool head(Right tool head) | 1400mm |
| ( Left milling tool head ) | 1000mm | |
| 11 | Vertical feed rate range of tool head (Right tool head) | 0.1-2000mm/min |
| ( Left milling tool head ) | 0.1-2000mm/min | |
| 12 | Horizontal and vertical rapid traverse speed of tool head mm/min:(Right turning tool head) | 4000 |
| ( Left milling tool head ) | 4000 | |
| 13 | Elevation stroke of cross rail | 1600mm |
| 14 | Elevation speed of cross rail | 487mm/min |
| 15 | Classification positioning distance of cross rail(mm): | 200 |
| 16 | Milling spindle speed of left milling tool head | 20-200-1000 r/min |
| 17 | Diameter of taped hole of milling tool head | 7:24(ISO50#) |
| 18 | Left milling tool head torqure and power | 570 Nm,12KW |
| 19 | Calculating speed of left milling tool head | 200 r/min |
| 20 | Tool arbor section | 40×50(mm) |
| 21 | Table T slot dimension | 28mm |
| 22 | Machine coordinates | X,Z,C,SP1,SP2,U,W |
| 23 | CNC Linked shaft(3 shafts) | X,Z,C |
| 24 | Angular milling speed | 15.3-153-767 r/min |
| 25 | Positioning accuracy of two tool head | 0.03mm |
| 26 | Repeatable positioning accuracy of tool head | 0.015mm |
| 27 | Machine dimension( Height from the earth ) | 5458mm |
| (Total height of machine) | 7178mm | |
| (Total width) | 9970mm | |
| (Total length ) | 7735mm | |
| 28 | Machine weight (T) | 68 |
2. Main character of machine
2.1 machine layout
This machine is Double column gantry structure, mainly composed of table, gear box, gantry, cross rail, two tool head, hydraulic device, coolant system, chip conveyor, semi-closed chip cover and electric system. The cross rail move along the guideway of column up and down, two tool heads are used in this machine, the whole system is all-closed control.
2.2 main structure and performance
2.3 main transmission system
The main transmission system is driven by SIMENS servo AC motor, the hydraulic cylinder push the engaged gears to change the speed of table, for that, the table can have 2 stsps and variable speed in between 0.63 and 63r/min,when operating under milling and indexing, backlash of table is available.
2.4 tool head
Left milling tool head is 3 level structure, composed of cross saddle, swivelling saddle and ram. The right turning tool head is four position electric turret. In the middle of ram of left milling tool head, milling driven device is set,it is driven by 12KW servo spindle through the gear box to drive the milling spindle to rotate,the milling tool is clamped by butterfly spring and released by pressure oil.At the end of the ram is gear plate, the angular milling head can be directly assembled on it. All the support bearings of ball screw are made of INA in Germany.
2.5 3CNC system
SINUMERIK 840D,SIMODRIVE 611D digital driven system and SIMATIC S7 PLC are used to ensure the machine can have the function of 3 linked axis work simultaneously, that is X, Z, C axis..
3.Accuracy and tolerance
Run-out of table in radial direction: 0.01/1000mm
Run-out of table surface: 0.01/1000mm
Perpendicularity of the movement of cross rail to the table surface:
In the plane that is perpendicular to the cross rail: 0.04/1000mm
In the plane that is parallel to the cross rail: 0.025/1000mm
Parallelism of the movement of ram head to the table surface: 0.03/1000mm
Perpendicularity of the movement of the ram head to the table surface:
In the plane that is parallel to the cross rail:0.02/1000mm
In the plane that is perpendicular to the cross rail: 0.04/1000mm
Positioning accuracy of X., Z axis: 0.03
Repeatable positioning accuracy of X, Z axis: 0.015
Reverse deviation of X, Z axis: 0.01
Surface roughness of work piece: Ra3.2μm
Fine finishing cylindrical surface of work piece:
Circularity of work piece: 0.01mm
Cylindricality of work piece: 0.015/300mm
Flatness of work piece: 0.03mm
| Packaging Detail:wooden packing |
| Delivery Detail:8-10months |


