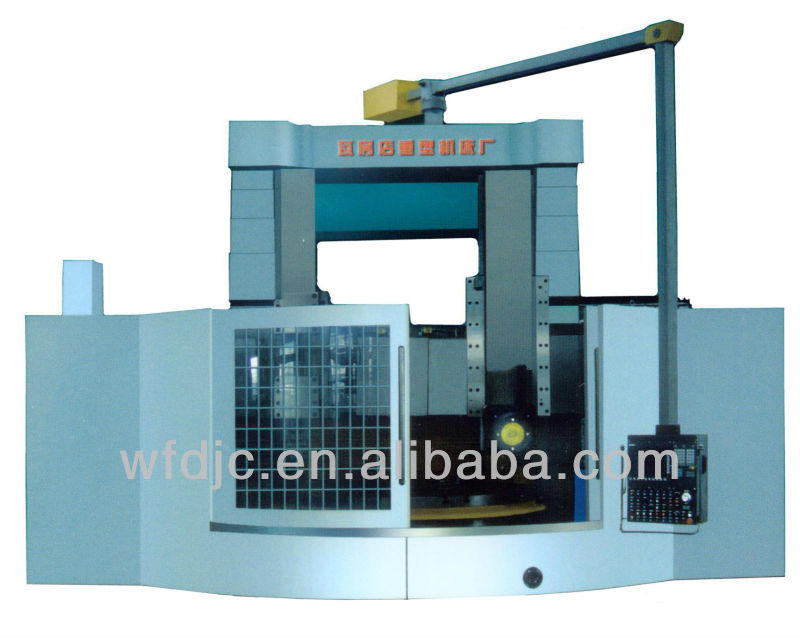
CK5225A/2 cnc machine
| Place of Origin:Liaoning China (Mainland) | Brand Name:wa | Model Number:CK52225A/2 | Condition:New |
| After-sales Service Provided:Engineers available to service machinery overseas |
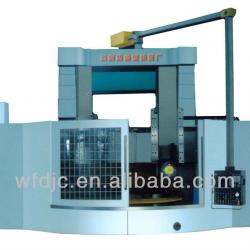
CK5225A/2(2500x2000)
This technical specification is specially used for φ2500×2000 CNC vertical lathe, the supplier will follow the relevant national norm to produce this machine.
1. technical parameter
1.1 model CK5225A/2
1.2 Parameter
| No. | Item | Parameter |
| 1 | The max. cuttting diameter | 2500 mm |
| 2 | The max. height of work piece | 2000 mm |
| 3 | The max. torque | 55800N•m |
| 4 | Faceplate speed range | 2.5~80 r/min |
| 5 | Faceplate speed steps | 2 shifts and variable speed |
| 6 | spindle power | 55KW |
| 7 | The max. cutting force of tool head(right tool head) | 29400N |
| (left tool head ) | 26400N | |
| 8 | Tool arbor dimension(WxH) | 40×50mm |
| 9 | Feed rate range of right tool head | 0.1~1000mm/min |
| 10 | Feed rate steps of right tool head | Variable |
| 11 | Rapid traverse of right tool head | 4000mm/min |
| 12 | Feed steps of left tool head | 18steps |
| 13 | Feed range of left tool head | 0.2~145mm/min |
| 14 | Rapid traverse of left tool head | 1550mm/min |
| 15 | The max. swivelling angle of left tool head | ±30° |
| 16 | Stroke of left and right tool head (horizontal ) | 1400 mm |
| Stroke of left and right tool head (vertical ) | 1000mm | |
| 17 | Stroke of cross rail | 1700 mm |
| 18 | Elevation speed of cross rail | 350 mm/min |
| 19 | Faceplate diameter | 2250mm |
| 20 | The max. weight of work piece | 20000kg |
| 21 | Overall dimension of machine(LxWxH) | 5180X5200X5270 mm |
| 22 | Machine weight | 35000kg |
2.Application and feature
This machien is CNC double column vertical lathe, the max. cutting diameter is 2500mm, the max. cutting height is 2000mm, carbide tool and high speed tool can be used in this machine to cut ferrus or non-ferrus material.
The SIMENS 828D system is used in this machine, semi-closed control can realize the inner and outer cylindrical surface cutting, surface cutting, arc cutting and other shaped surface cutting etc.
3 main structure and performance
3.1 General layout of machine
This machine is composed of column, main gear box, faceplate, cross rail elevation mechanism, tool head, electric system, hydraulic system. This machine is gantry frame strucutre, that means that the two columns are separately connected with each side of the faceplate base, the main gear box is connected with the rear end of the faceplate base. The cross rail can move along the slideway of column up or down, two tool heads are set on the slideway of cross rail to cut the work piece, the left one is manul control , the right one is CNC control, the two tool heads can get feed motion in horizontal and vertical direction by controlling the suspending pendant station. Most of the machine control can be done through the pendant station.
This machien is semi-closed control
3.2Performance of main parts
3.2.1The main drive system is driven by the AC variable frequency motor, the hydraulic cylinder push the shifting fork to change the gears’ engagement to realize the speed change of the faceplate, 2 shifts and variabe speed can be available, the speed rang is in between 2.5~80 r/min.
3.2.2 Feed mechanism
CNC servo motor is used in this machine , this motor is connected with the 1:3 gear box to drive the ball screw to realize the horizontal(X axis) and vertical(Z axis)feed of right tool head also rapid traverse of right tool head. The horizontal and vertical feed motion of left tool head is driven by the lead screw and light bar which are separately connected with the feed box., the feed rate of both tool heads is 18steps and 0.24-145mm/min, the rapid traverse is1550mm/min.
3.3Structrue character of main parts
3.3.1The hydro-static guideway is used in the faceplate to undertake the table load, two spindle bearings Model 3182100 are set to adjust the radial clearance to ensure the high rotating precision, on the top of the faceplatel, four chucck jaws are set to clamp the work piece.
3.3.2The column is connected with the table base, the materials are made of low press casting, cross rail elevation mechanism is set on the column, that is driven by the AC motor realize the up or down movement of the cross rail.
3.3.3The cross rail can move along the slideway of column, that is driven by the two lead screws, safety floating nut is set on the cross rail to ensure the safety and precision of the machine. The cross rail is clamped by the belleville spring and released by the hydraulic cylinder
3.3.4The tool heads are three layers of structure, which is composed of swivelling carriage, cross rail carriage and ram. The material is low press casting, the ram material is nodular cast iron, on the sliding guideway of right tool head, American made soft belt is pasted and hand scraped, alll the support bearings for the ball screw are INA bearing made in Germany.
3.3.5The hydraulic system is composed of faceplate hydrau-dynamic system, main transmission system speed change system, cross rail clamping and releasing system, tool head hydraulic balancing system, lubricatin system etc. The key hydraulic elemnts are purchased from the world famous factory to ensure the good quality of machine.
3.3.6The lubricatin ways is centralized lubrication.
3.4CNC system
SIMNES 828D
3.4.1 2 axis CNC Control
3.4.2 2 linked axis
3.4.3 linear and circle interpolation
3.4.4 reverse clearance and screw compensation
3.4.5 work coordinate setting
3.4.6 tool point radius compensation
3.4.7 10. 4"LCD monitor LCD
3.4.8(0~120%) Rapid motion magnification
3.4.10 PLC
3.4.11 work drawing programming
3.4.12 handwheel feed
3.4.13 warning message
3.4.14 computer outer port RS-232
4.Machine accuracy(JB/T9934.1~9934.2-1999
Radial run-out of face plate in the diameter of 1000mm, the tolerance is0.01mm, every increment of 1000mm in the diameter, the tolerance increase by 0.01mm.
Run-out of faceplate end surface in the diameter of 1000mm, the tolerance is0.01mm, every increment of 1000mm in the diameter, the tolerance increase by 0.01mm.
The perpendicularity of the cross rail movement to the face plate.
0.06/1000 in the plane perpendicular to the cross rail
0.04/1000 in the plane parallel to the cross rail
the parallelism of the tool head to the faceplate surface in the measuring lenghth of 1000mm, the tolerance is 0.03mm
the perpendiculary of the ram movement to the faceplate surface
0.03 in the plane parallel to the cross rail
0.05mm in the plane perpendicular to the cross rail
Maching accuracy IT7
Work piece roughness Ra1.6μm
Circularity of fine machining outer surface 0.02
Cylindricity of fine machining outer surface 0.01/300
Flatness of fine machining end surface 0.03
Positioning accuracy of X., Z axis: 0.03
Repeatable positioning accuracy of X, Z axis: 0.015
Reverse deviation of X, Z axis: 0.01
5.Operation manual
(including packing list, foundatin drawing, drawings for easily damaged parts, mechanic,hydraulic and electric operation manual),SIMENS diagnose book, SIMENS programming book.
| Packaging Detail:wooden packing |
| Delivery Detail:4-5months |


