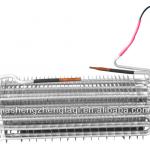
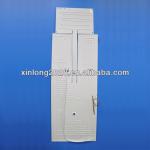
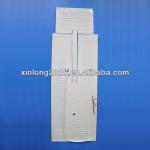
Rectangle Electric heating Unit for Chafing Dish
| Place of Origin:Shanghai China (Mainland) | Brand Name:shenming | Model Number:NCJBT-250C | Type:Heat Exchanger Tube,Utensils |
| Application:Heater Parts | Certification:CE | Material:Aluminum | Size:200*250 |
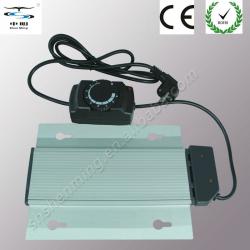
| Name: | Rectangle Electric Heating Unit for Chafing Dish With Thermostat |
| Rating voltage: | 220-240V |
| Material: | Alu.alloy |
| Working power: | 300W 500W 700W |
| Frequency: | 50Hz |
| Size: | 200(W)×250(L)mm |
| High-voltage resistance: | 1500V |
Compared with solid-alcohol-burner which is normally used for heating chafing dishes, our product of heating Unit has the advantages of safe, green, energy-saving and convenient to installation. It can heat the water in water-pan up to 65~95°C,and keep the food temperature at 60~90°C to protect the natural taste of food and nutrition.
The electric heating unit fits directly under the water pan, thus ensuring perfect heat transfer. The heat control (without a thermostat) protects the chafing dish from overheating while saving energy.
Installation
Diameter 200 round
1.Type 1 is to take the water pan out of the stand and turn it upside down.(step 1). Then to insert the fillister and slide the heating unit to the right place(middle is the best place)(step 2) 2.Type 2 : step 1 is to take the water pan out of the stand and turn it upside down. Insert the heating board on the threaded studs. step 2 is to slide the heating unit(pay attention to the direction arrow) until it reaches the stop of the elongated perforations.CAUTION: Never unplug the unit by pulling on the electrical cord!Step 3 is to tighten with the hand nuts.Please tighten the hand nuts only by hand!
Using the Chafing Dish
1. Fill the water pan with hot water(50°to 60°C). Please note that the pans should not be immersed in the water!
Check the water level and then. The pan must never be used without water!
2. Close the lid.
3. Plug in the cord of the electric heating unit. Then wait 30 to 40 minutes for the chafing dish to reach the perfect temperature.
CAUTION: Never use the electric heating unit when it is not inserted in the water pan!
(NOTE: With electric heating units that have a power control the maximum power can be progressively reduced if required. Position<9>=maximum·Position<1>=minimum·Position<0>=off)
STEPS AND TEMPERATURE
| The Step on Thermostat | temp. |
| 1~1.5# | START POSITION |
| 2# | 65°C |
| 3# | 130°C |
| 4# | 172°C |
| 5# | 190°C |
| 6# | 219°C |
| 7# | 216°C |
| 8# | 235°C |
| 9# | 235°C |
Disassembly
1. Unplug the cord.
2. Wait until the water pan and the electric heating unit have cooled down.
3. Take the water pan out of the stand and turn it upside down.
4. Unscrew hand nuts by hand.
5. Slide the heating unit out of the elongations and lift it off the threaded studs.
Cleaning
1. Unplug the cord.
2. Wait until the water pan and the electric heating unit have cooled down.
3. Take the heating unit off the water pan as indicated in <<Disassembly>>.
4. Clean it with a sightly damp cloth
CAUTION: Do not sub merge the heating unit in water or rinse it under running water!
Transportation
Please always unplug the cord before you move your chafing dish or beverage dispenser!
Possible Faults and their Cause
·Food cools off and is not kept warm.
-The water pan was filled with cool water.
-Preheating time too short or no preheating.
-Heating unit was not correctly tightened.
To: -Fill water pan with hot water.
-Preheat unit for 30-40 minutes.
-Tighten heating unit by hand.
-Turn power control up.
·Great heat loss.
-Lid remains open.
TO: -Keep lid closed whenever possible:
-To prevent food from drying out.
-To guarantee more hygienic conditions.
-To save energy.

| Packaging Detail:73*40*24 |
| Delivery Detail:Half month |


