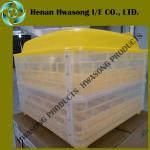
chicken egg incubator JN8-48 JANOEL incubator mini incubator
| Usage:Chicken,Bird,Ostrich | Egg Capacity(pcs):48 | Condition:New | Place of Origin:China (Mainland) |
| Brand Name:JANOEL | Model Number:JN8-48 | Voltage:220V | Weight:7KG |
| Certification:CE | Warranty:1year |
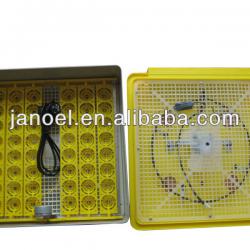
JN8-48 automatic egg incubator small incubator family incubator table incubator mini incubator newest incubator
JANOEL INCUBATOR,we have patent and CE certificate and australia safe report.
now have some supplier copy our JN8-48.pls check sample first and copy incubator is very cheap but quality is very bad.so we change the new mode to JANOEL8-48.
1.Our incubator’s material is ABS that not easy broken and aging.
2.Copy incubator egg tray is easy deformation and fracture. Especially machine temperature is 38degree then egg tray bend.
3.Flat egg tray easy to deform and unsuitable chick standing
4.counterfeit JANOEL patent(especially controller panel)
5.Copy incubator without high and low temperature alarm and humidity
Display is inaccurate.Error of humidity display is over 30% due humidity probe is not IC Integration .
6.Copy incubator’s power is too large that startup power is over 500w then easy to make
fire
7.copy incubator long time at a constant temperature of 38 degree state.Then heating system surface temperature too high that easily cause the machine casing aging and fire.
8.Temperature error is 6 degrees in copy incubator
9.Copy incubator’s Fan noise is large,fast turn-degree,small blade,then the temperature is inconsistent in the middle and edge.
10.HD,HU argument is bogus.
IF THE ENVIRONMENT TEMPERATURE BEYOND 28 DEGREE,PLEASE PUT OFF THE FOAM PACKAGE, IT CAN KEEP THE CONTROLLED TEMPERATURE WELL
Push-button Instruction:
AFTER OPERATED MACHINE,IT MAYBE GIVE AN ALARM, SO PLEASE PUT ANY KEY OF " SET", "+" OR " "-" TO WHITE ALERT.
1. SET:
A: Push SET once to enter temperature control set, push “+” or “-” to adjust parameter, push “+” or “-” for 3s to enter fast adjustment mode, push SET again to exit from setting state.
B: Push SET for 3s to enter system menu set, push “+”or “-” to select menu in need of adjustment, then push SET again to enter relative parameter setting state, push “+” or “-” to select parameter in need of modification, push RST to exit after adjustment, or the system will exits after 5s delay.
2. “+”: Up button
3. “-”: Down button
Operation Instruction:
Indicating lamp state instruction:
WORK lamp on the left side of display screen is made as work indicating lamp, LED normally on means it’s in heating state.
SET lamp on the left side of display screen is used for indicating lamp set, LED normally on means it’s in setting state.
Function instruction:
HU, HD:
Prameter HU and HD, set by factory, is supposed not to be modified by user.
Temperature correction function:
When measuring temperature deviates from reference temperature, temperature correction function shall be used to make the measuring value in accordance with reference temperature, temperature after correction shall be the sum of temperature before correction and correction value (correction value can be positive number, negative number or zero).
Temperature correction set:
Push “SET” for 3s to enter menu display, push “+” or “-” until code “CA” appears on screen, then push “SET” to display temperature correction setting value, push “+” or “-” again to adjust parameter.
Upper and lower limit function:
HS and LS set limits setting range of temperature control, e.g., if HS is set as +15 and LS is set as -10, then the temperature can only be set from -10 to +15, so the display value still keeps as -10 after pushing “-” if it displays -10; the display value still keeps as +15 after pushing ““+”” if it displays +15. If setting value is beyond the setting range, then HS and LS must be changed at first.
Upper and lower limit set:
Push “SET” for 3s to enter menu display, push “+” or “-” until code “HS” or “LS” appears on screen, push “SET” to display upper or lower limit setting value, then push “+” or “-” to adjust the parameter. HS means upper limit and LS means lower limit.
Humidity alarm function:
If measuring humidity is less than AU setting value, the temperature controller sends alarm and the humidity indicating lamp flickers. The alarm can stop by pushing any button.
Humidity alarm set:
Push “SET” for 3s to enter menu display, push “+” or “-” until code “AS” appears on screen, push “SET” to display humidity alarm setting value, then push “+” or “-” again to adjust parameter.
High temperature alarm function:
If measuring temperature is higher than sum of setting temperature and AH, the temperature controller sends alarm and the display screen alternately displays H and current temperature. The alarm can stop by pushing any button.
High temperature alarm set:
Push “SET” for 3s to enter menu display, push “+” or “-” until code “AH” appears on screen, push “SET” to display high temperature alarm setting value, then push “+” or “-” to adjust parameter, the high temperature alarm function can be closed when AH is set as 0.
Low temperature alarm function:
If measuring temperature is lower than the result when setting temperature minus AL, the temperature controller sends alarm and the display screen alternately displays L and current temperature. The alarm can stop by pushing any button.
Low temperature alarm set:
Push “SET” for 3s to enter menu display, push “+” or “-” until code “AL” appears on screen, push “SET” to display low temperature alarm setting value, then push“+” or “ ” to adjust parameter. The low temperature alarm function can be closed when AL is set as 0.
Menu Code Selection:
| Symbol | Instruction | Setting range | Factory set | Unit |
| HU | Heating power parameter | 1-90 | 18 | |
| HD | Heat preservation power parameter | 1-80 | 11 | |
| LS | Setting lower limit | -9.9~HS | 30 | °C |
| HS | Setting upper limit | LS~99.9 | 39.5 | °C |
| CA | Temperature correction | -5~+5 | 0 | °C |
| AS | Humidity alarm | 1~99 | 45 | % |
| AH | Ultrahigh temperature alarm output | 0-15 | 1 | °C |
| AL | Ultralow temperature alarm output | 0-15 | 1 | °C |
cubation Technology
1. Incubation Temperature Control
Different poultry requires different temperatures: incubation period of chicken is 21 days, it’s 38.2°C from 1st~6th day, 37.8°C from 7th~14th day, and 37.2~37.5°C from 16th~21st day; incubation period of duck is 28 days, it’s 38°C from 1st~7th day, 37.8°C from 8th~15th day, 37.5°C on 16th day, and 37.2°C from 17th ~28th day; incubation period of goose is 31 days, it’s 37.8°C from 1st ~8th day, 37.8°C from 9th ~18th day, 37.8°C on 19th day, and 37.0°C~37.3°C from 20th~31st day.
2. Humidity Control
It requires different relative humidity in different period of incubation. The relative humidity shall keep within 55%~60% at the earlier stage of incubation to ensure even heating for embryo, which is good for formation of allantoic fluid and amniotic fluid, the relative humidity shall keep within 30%~55% at the middle stage of incubation, which is good for evaporation of water, the relative humidity the last stage of incubation shall be increased to 65%~70%, as high relative humidity is good for poult to break the shell, when above 20% of poult comes out, the relative humidity shall keep at 75%.
III.
1.Cleaning and sterilization before incubation: wash and clean the incubator, then suffumigate it with potassium permanganate and formalin.
2.Incubation equipment inspection before incubation: check all of the device completely and observe whether the fan rotation and egg turning device works normally and whether all of the components are in good condition, then adjust the temperature and feed water to the tank. make a 12-24 hours’ trial again when the incubator reaches temperature and humidity requirement, if the incubator works normally, it can be put into running.
3. Choose and store fresh egg within 5 days (7 days at most) as feeding egg, as for the egg stored for more than 5 days, 4% less the incubation rate and 30 minutes prolonged incubation period for one more day storage. The proper temperature for feeding egg storage is 12°C~16°C.The smaller side shall be put upside during feeding egg storage.
4. Notes for off-tray period: The process to remove from egg tray bracket to brood tray is called off-tray, the chick embryo usually removes off the tray at an age of 18-19 days. It shall be placed gently during off-tray, it’s best to lay to single layer. It also removes to brood tray 3 days earlier than incubation period for other poultry.
Poultry Incubation Parameter

| Packaging Detail:1pc/colour box,2pcs/carton |
| Delivery Detail:3-7days after receive payment |


